

Pada bagian awal blog ini, saya akan membagikan berbagai error yang saya temui dari para peserta selama training, termasuk proses analisis dan problem solving yang dilakukan. Selanjutnya, artikel ini akan membahas penyelesaian quiz 1 sampai quiz 3.
Error
Dial tcp 127.0.0.1:8080: connect: connection refused
Error seperti ini didapatkan ketika mencoba mengoperasikan command kubectl seperti kubectl get node dan lain-lain. Hal pertama yang di perlukan adalah pastikan file kubeconfig tersedia pada folder .kube di user yang akan menjalankan kubectl.
Check folder
.kubedankubeconfig
ls -a ~/ # Jika folder .kube ada check file config
ls -l ~/.kube/config # Jika folder dan config tidak ada lanjut step 2
Copy kubeconfig ke .kube
mkdir ~/.kube
sudo cp /etc/kubernetes/admin.conf ~/.kube/config
sudo chown $(id -u):$(id -g) ~/.kube/config
Verifikasi dengan check node dan pod
kubectl get node
kubectl get pod -n kube-system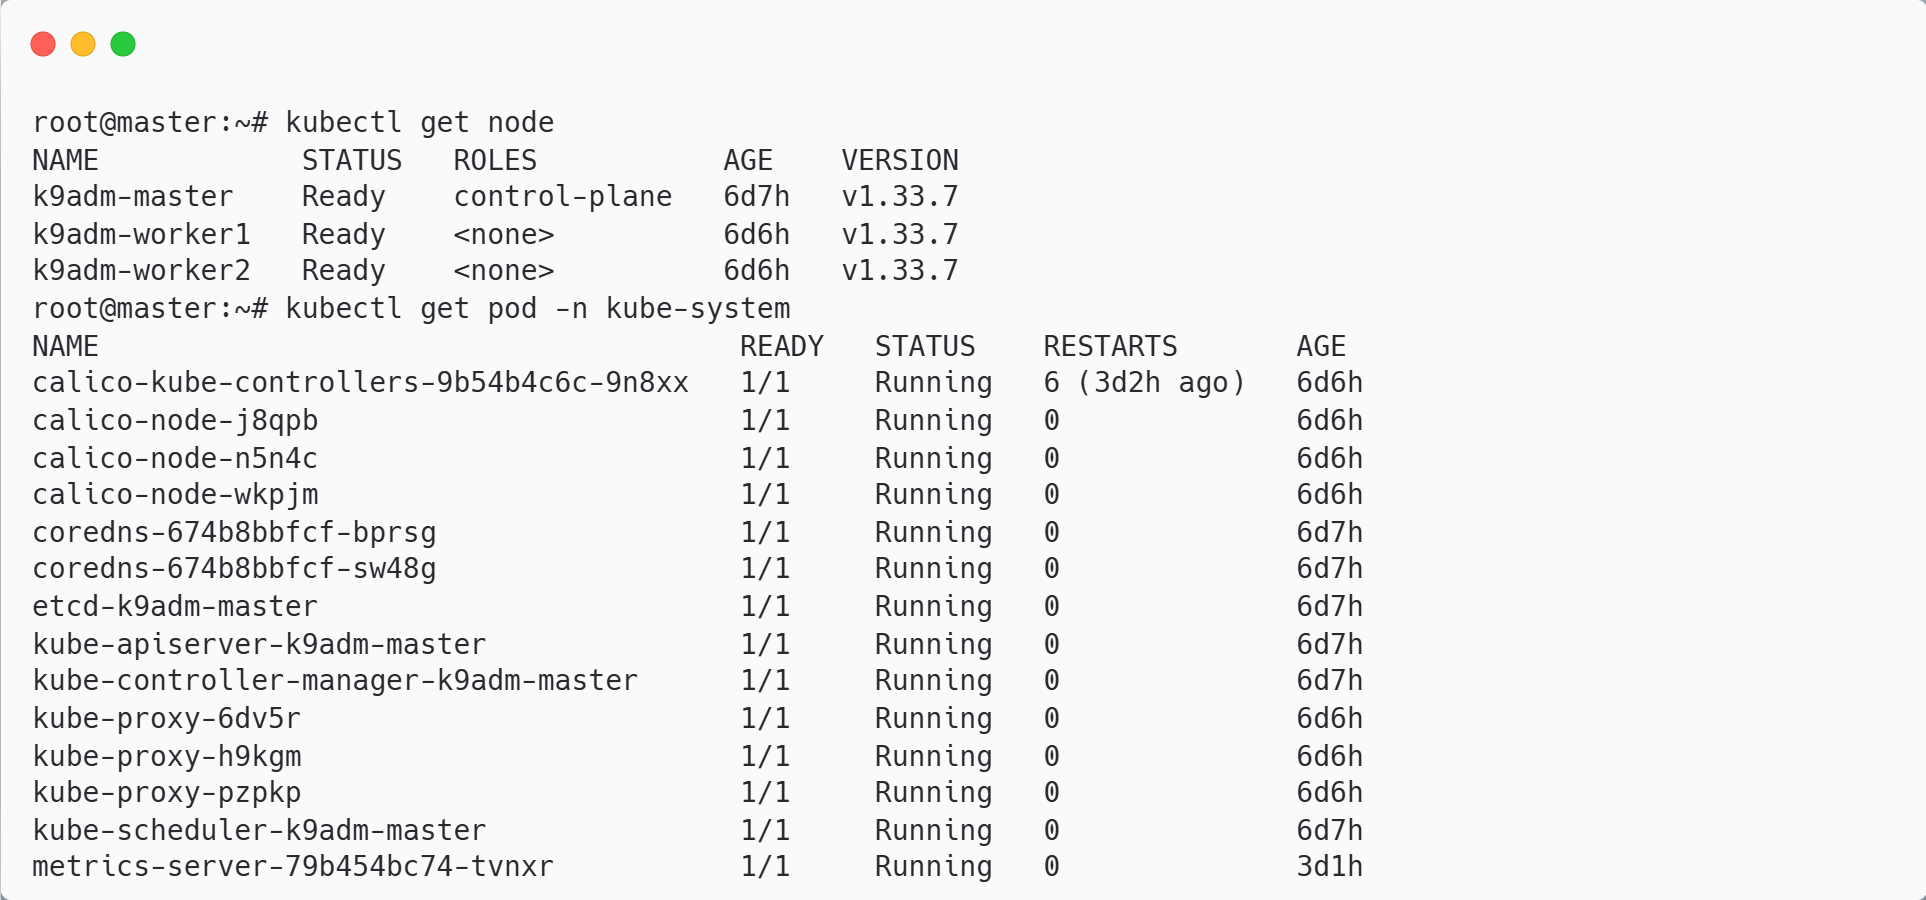
Selalu copy kubeconfig pada instance yang ingin terhubung dengan cluster
Error: Calico-node failed not intilialized
Ketika menginstall calico sebagai cni ada beberapa case yang gagal sehingga node state nya akan berubah menjadi NotReady karena komunikasi cluster akan mendapati gangguan. Disini saya akan menjelaskan untuk proses troubleshooting untuk calico:
Check logs pod calico-node
Get pod error calico-node
kubectl get pod -n kube-system -k k8s-app=calico-nodeDescribe pod calico-node
kubectl describe -n kube-system pod calico-node-xxxx <- paste your pod errorCheck logs pod calico-node
kubectl logs -n kube-system calico-node-xxxx -c install-cni
---
Get https://[10.96.0.1]:443/apis/crd.projectcalico.org/v1/clusterinformations/default: dial tcp 10.96.0.1:443: i/o timeout
Create configmap
kubectl create cm -n kube-system kubernetes-services-endpoint\
--from-literal=KUBERNETES_SERVICE_HOST=k9adm-master\
--from-literal=KUBERNETES_SERVICE_PORT=6443
Jangan lupa untuk semua node di mapping hosts master
nano /etc/hosts
---
172.1.1.10      k9adm-master
Restart daemonset calico-node
kubectl rollout restart daemonset -n kube-system calico-nodeError: Metrics Not Available Yet
Error ini biasa terjadi ketika menginstall metrics-server berhasil namun saat ingin verifikasi menggunakan kubectl top gagal mendapatkan usage resource pod atau node.
Cara memperbaiki seperti di bawah ini:
Check heatlh-check api
kubectl get apiservices v1beta1.metrics.k8s.io
---
NAME                     SERVICE                      AVAILABLE   AGE
v1beta1.metrics.k8s.io   kube-system/metrics-server   False       6d5h
Check penyebab api false
Check pod metrics-server pastikan running
kubectl get pod -n kube-system -l k8s-app=metrics-server -o wide
Check logs pod metrics-server
kubectl logs -n kube-system metrics-server-xxxxx-xxxxxDescribe apiservice metrics-server
kubectl describe apiservices v1beta1.metrics.k8s.ioJika terdapat error ke api kubernetes dapat dicoba dengan delete kube-proxy pada node master
Delete pod kube-proxy di node-master
Check name pod kube-proxy yang ada master
kubectl get pod -n kube-system -l k8s-app=kube-proxy -o wide
Delete pod
kube-proxy-h9kgm
kubectl delete pod -n kube-system kube-proxy-h9kgmVerifikasi
kubectl top nodedankubectl top pod
kubectl top node
kubectl top pod -n kube-system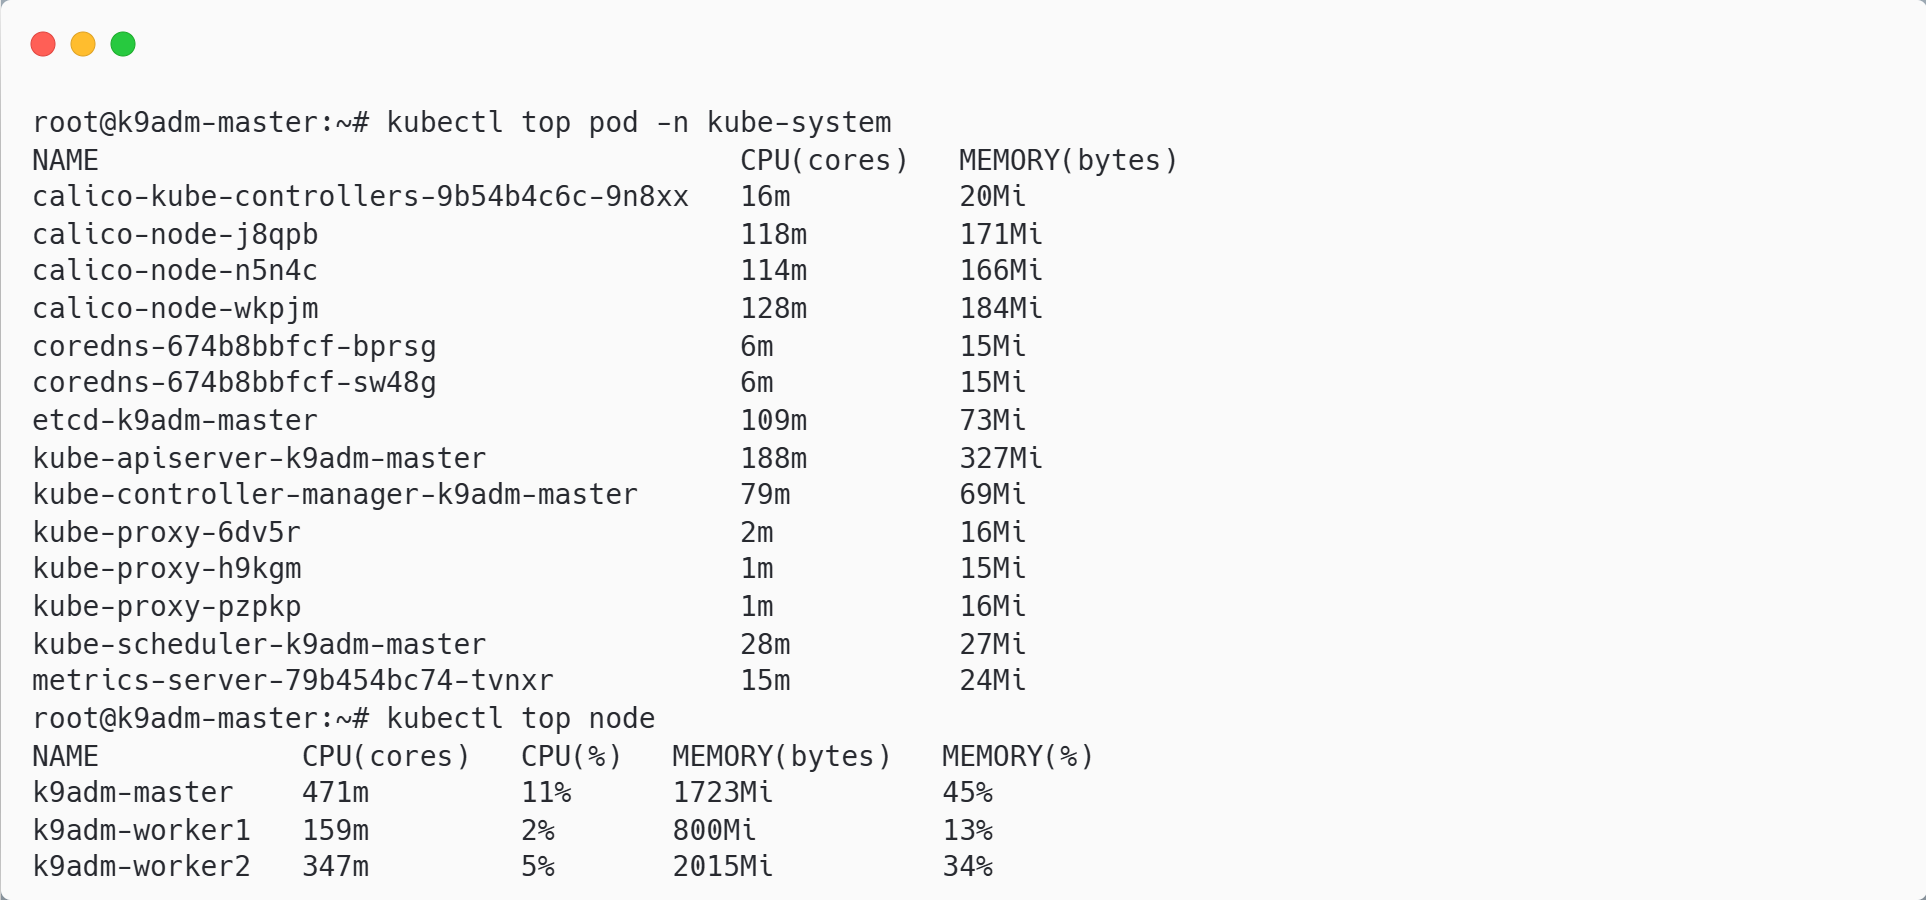
Error: Can't Hit ClusterIP Service
Pada saat pengetesan hit clusterip mengalami timeout yang dimana ekspetasinya adalah ketika hit akan success 200. Cara ini bisa solve dengan mencoba delete pod kube-proxy node master atau bisa juga dengan restart daemonset kube-proxy tapi restart kube-proxy tidak disarankan pada level production karena cluster akan mengalami intermitten ketika proses restart berlangsung.
Opsi 1 delete pod
kube-proxynode master dapat mereferensi pada artikel sebelumnyaOpsi 2 restart daemonset
kube-proxy
kubectl rollout restart daemonset -n kube-system kube-proxyTips To Debug
Check status pod
kubectl get pod -n {namespace}Describe pod agar mengetahui lebih jelas state yang berjalan
kubectl describe pod -n {namespace}Check logs apabila pod gagal di jalankan
kubectl logs -n {namespace} {name-pod}Check logs per container apabila pods memiliki lebih dari satu container
kubectl logs -n {namespace} {name-pod} -c {name-container}Check service komponen kubernetes pastikan running
kubectl get pod -n kube-system

# check setiap node
systemctl status kubelet
Check hostname pastikan setiap ip node cluster sudah di mapping pada hostname
#Jika tidak ada hostname di /etc/hosts

NODE_LIST=$(kubectl get nodes -o wide --no-headers | awk '{print $1,$6}')

ALL_NODES=$(kubectl get nodes --no-headers | awk '{print $1}')

for node in $ALL_NODES; do
  echo "Updating /etc/hosts on $node"

  for entry in "$NODE_LIST"; do
    NODE_NAME=$(echo $entry | awk '{print $1}')
    NODE_IP=$(echo $entry | awk '{print $2}')

    ssh $node "grep -q '$NODE_NAME' /etc/hosts || \
      echo '$NODE_IP $NODE_NAME' | sudo tee -a /etc/hosts > /dev/null"
  done
done
Quiz
Quiz 1
Namespace Requirements:
Create namespace:
nginxCreate namespace:
httpd
Pod & Image Requirements:
Nginx Deployment (Namespace:
nginx):Create 2 Pods named:
{username}-pod-nginx-1and{username}-pod-nginx-2Image:
registry.adinusa.id/adinusa/nginx:alpineLabel:
app=nginx
HTTPD Deployment (Namespace:
httpd):Create 2 Pods named:
{username}-pod-httpd-1and{username}-pod-httpd-2Image:
registry.adinusa.id/adinusa/httpd:2.4Label:
app=httpd
Create namespace
kubectl create ns httpd
kubectl create ns nginx
Create manifest pod nginx dan httpd
nano quiz1-pods.yamlapiVersion: v1
kind: Pod
metadata:
name: valansy-pod-nginx-1
namespace: nginx
labels:
app: nginx
spec:
containers:
- name: nginx-container
image: registry.adinusa.id/adinusa/nginx:alpine
ports:
- containerPort: 80
---
apiVersion: v1
kind: Pod
metadata:
name: valansy-pod-nginx-2
namespace: nginx
labels:
app: nginx
spec:
containers:
- name: nginx-container
image: registry.adinusa.id/adinusa/nginx:alpine
ports:
- containerPort: 80
---
apiVersion: v1
kind: Pod
metadata:
name: valansy-pod-httpd-1
namespace: httpd
labels:
app: httpd
spec:
containers:
- name: httpd-container
image: registry.adinusa.id/adinusa/httpd:2.4
ports:
- containerPort: 80
---
apiVersion: v1
kind: Pod
metadata:
name: valansy-pod-httpd-2
namespace: httpd
labels:
app: httpd
spec:
containers:
- name: httpd-container
image: registry.adinusa.id/adinusa/httpd:2.4
ports:
- containerPort: 80Apply manifeset nginx dan httpd
kubectl apply -f quiz1-pods.yamlVerifikasi pod nginx dan httpd
kubectl get pod -n nginx
kubectl get pod -n httpd
Quiz 2
1. Configuration:
ConfigMap: Create a ConfigMap named
{username}-configcontaining a customnginx.conf
2. Storage Requirements (PV & PVC):
PersistentVolume (PV): - Name:
{username}-pvCapacity:
1Gi,Access Mode:
ReadWriteManyHostPath:
/opt/data, This folder with file already onk9adm-worker1andk9adm-worker2, after runnusactl start, You can verify
PersistentVolumeClaim (PVC):
Name:
{username}-pvcRequest:
1GiAccess Mode:
ReadWriteMany
3. Workload (Deployment):
Name:
{username}-nginx-quizReplicas:
2Image:
registry.adinusa.id/adinusa/nginx:alpineStorage Attachment: Mount the PVC to directory
/usr/share/nginx/htmlinside the container.Volume: Reference the
{username}-configwithin the deployment spec. Attach to/etc/nginx/nginx.conf
4. Service NodePort
Name:
{username}-svc-quizPort:
30001
5. Ingress
Name:
{username}-ing-quizDomain:
{username}-quiz.idAttach into svc:
{username}-svc-quizMake sure can access with curl from Workstation
Create configmap nginx.conf
Buat file nginx.conf
nano nginx.conf
---
user  nginx;
worker_processes  auto;

error_log  /var/log/nginx/error.log notice;
pid        /run/nginx.pid;


events {
    worker_connections  1024;
}


http {
    include       /etc/nginx/mime.types;
    default_type  application/octet-stream;

    log_format  main  '$remote_addr - $remote_user [$time_local] "$request" '
                      '$status $body_bytes_sent "$http_referer" '
                      '"$http_user_agent" "$http_x_forwarded_for"';

    access_log  /var/log/nginx/access.log  main;

    sendfile        on;
    #tcp_nopush     on;

    keepalive_timeout  65;

    #gzip  on;

    include /etc/nginx/conf.d/*.conf;
}
Create configmap dari file nginx.conf
kubectl create configmap valansy-config --from-file nginx.confCreate PV dan PVC
Create manifest pv dan pvc
nano quiz2-storage.yamlapiVersion: v1
kind: PersistentVolume
metadata:
name: pv-valansy
spec:
capacity:
storage: 1Gi
accessModes:
- ReadWriteMany
persistentVolumeReclaimPolicy: Retain
hostPath:
path: "/opt/data"
apiVersion: v1
kind: PersistentVolumeClaim
metadata:
name: pvc-valansy
spec:
accessModes:
- ReadWriteMany
resources:
requests:
storage: 1GiApply file storage
kubectl apply -f quiz2-storage.yamlCreate deployent nginx
Create manifest
nano quiz2-deployment.yamlapiVersion: apps/v1
kind: Deployment
metadata:
annotations:
deployment.kubernetes.io/revision: "1"
generation: 1
name: valansy-nginx-quiz
labels:
app: nginx
spec:
replicas: 2
selector:
matchLabels:
app: nginx
strategy:
rollingUpdate:
maxSurge: 1
maxUnavailable: 1
type: RollingUpdate
template:
metadata:
labels:
app: nginx
spec:
containers:
- image: registry.adinusa.id/adinusa/nginx:alpine
imagePullPolicy: Always
name: nginx
volumeMounts:
- name: vol
mountPath: /usr/share/nginx/html
- name: vol-cm
mountPath: /etc/nginx/nginx.conf
subPath: nginx.conf
ports:
- containerPort: 80
protocol: TCP
volumes:
- name: vol
persistentVolumeClaim:
claimName: pvc-valansy
- name: vol-cm
configMap:
name: valansy-configApply manifest
kubectl apply -f quiz2-deployment.yamlCreate service from deployment
create service
kubectl expose deployment valansy-nginx-quiz --name=valansy-svc-quiz --type NodePort --port 80
# Format penulisan
# kubectl expose {nama-deployment} --name={nama-service} --type NodePort --port 80 --node-port 30001
patching nodeport ke 30001
kubectl patch svc valansy-svc-quiz \
  --type='json' \
  -p='[
    {
      "op": "replace",
      "path": "/spec/ports/0/nodePort",
      "value": 30001
    }
  ]'
Create ingress
kubectl create ingress valansy-ing-quiz --rule="valansy-quiz.id/=valansy-svc-quiz:80"Tambahkan domain pada mapping ip loadbalancer
nano /etc/hosts
---
172.1.1.100     valansy-quiz.id
# ip-loadbalancer-ingress    domain
Verifikasi
curl valansy-quiz.id
Quiz 3
1. Environment Setup:
Namespace: Create and use a namespace named
quizfor all subsequent resources.Node Labeling:
Label
k9adm-worker1withnode-environment=productionLabel
k9adm-worker2withnode-environment=staging
2. Database Workload (Pod & Service):
Database Pod:
Name:
{username}-dbImage:
mysql:8.0(Environment variables for DB initialization are optional for this task).Mysql env:
MYSQL_ROOT_PASSWORD:rootpwquizMYSQL_DATABASE:quiz-db
Database Service:
Name:
db-svc-quizType:
ClusterIP
3. Application Workloads (Deployments):
Deployment V1 (Production):
Name:
{username}-quiz-v1Replicas:
2Image:
mysql:8.0Node Selection: Must run only on nodes with
node-environment=production.Service: Create
prod-svc-quiz(NodePort:32701) pointing to this deployment.
Deployment V2 (Staging):
Name:
{username}-quiz-v2Replicas:
1Image:
mysql:8.0Node Selection: Must run only on nodes with
node-environment=staging.Service: Create
stg-svc-quiz(NodePort:32702) pointing to this deployment.
4. Network Security (NetworkPolicy):
Name:
{username}-net-quizRequirement: Apply a policy to the
{username}-dbpod.Rule: Allow traffic ONLY from pods located on nodes labeled
node-environment:production. You can use labels that you want.Connectivity: Ensure the database is accessed only via the service name
db-svc-quiz.
Enviroment Setup
Create namespace
quiz
kubectl create ns quizLabeling node
kubectl label nodes k9adm-worker1 node-environment=production
kubectl label nodes k9adm-worker2 node-environment=staging
Setup database
Create pod
kubectl run {username}-db --image=mysql:8.0 -n quiz \
  --env=MYSQL_ROOT_PASSWORD=rootpwquiz \
  --env=MYSQL_DATABASE=quiz-db
Create service
kubectl expose pod -n quiz valansy-db --port 3306 --name db-svc-quiz -n quizSetup deployment
Create manifest prod
nano quiz3-prod.yamlapiVersion: apps/v1
kind: Deployment
metadata:
name: valansy-quiz-v1
namespace: quiz
spec:
replicas: 2
selector:
matchLabels:
app: quiz-v1
env: prod
template:
metadata:
labels:
app: quiz-v1
env: prod
spec:
nodeSelector:
node-environment: production
containers:
- name: mysql
image: mysql:8.0
env:
- name: MYSQL_ROOT_PASSWORD
value: rootpwquiz
- name: MYSQL_DATABASE
value: quiz-db
ports:
- containerPort: 3306
---
apiVersion: v1
kind: Service
metadata:
name: prod-svc-quiz
namespace: quiz
spec:
type: NodePort
selector:
app: quiz-v1
env: prod
ports:
- port: 3306
targetPort: 3306
nodePort: 32701Apply manifest prod
kubectl apply -f quiz3-prod.yamlCreate manifest staging
nano quiz3-stag.yamlapiVersion: apps/v1
kind: Deployment
metadata:
name: valansy-quiz-v2
namespace: quiz
spec:
replicas: 1
selector:
matchLabels:
app: quiz-v2
env: stag
template:
metadata:
labels:
app: quiz-v2
env: stag
spec:
nodeSelector:
node-environment: staging
containers:
- name: mysql
image: mysql:8.0
env:
- name: MYSQL_ROOT_PASSWORD
value: rootpwquiz
- name: MYSQL_DATABASE
value: quiz-db
ports:
- containerPort: 3306
---
apiVersion: v1
kind: Service
metadata:
name: stg-svc-quiz
namespace: quiz
spec:
type: NodePort
selector:
app: quiz-v2
env: stag
ports:
- port: 3306
targetPort: 3306
nodePort: 32702Apply manifest staging
kubectl apply -f quiz3-stag.yamlVerifikasi pod dan service
kubectl get pod -n quiz -o wide
kubectl get svc -n quiz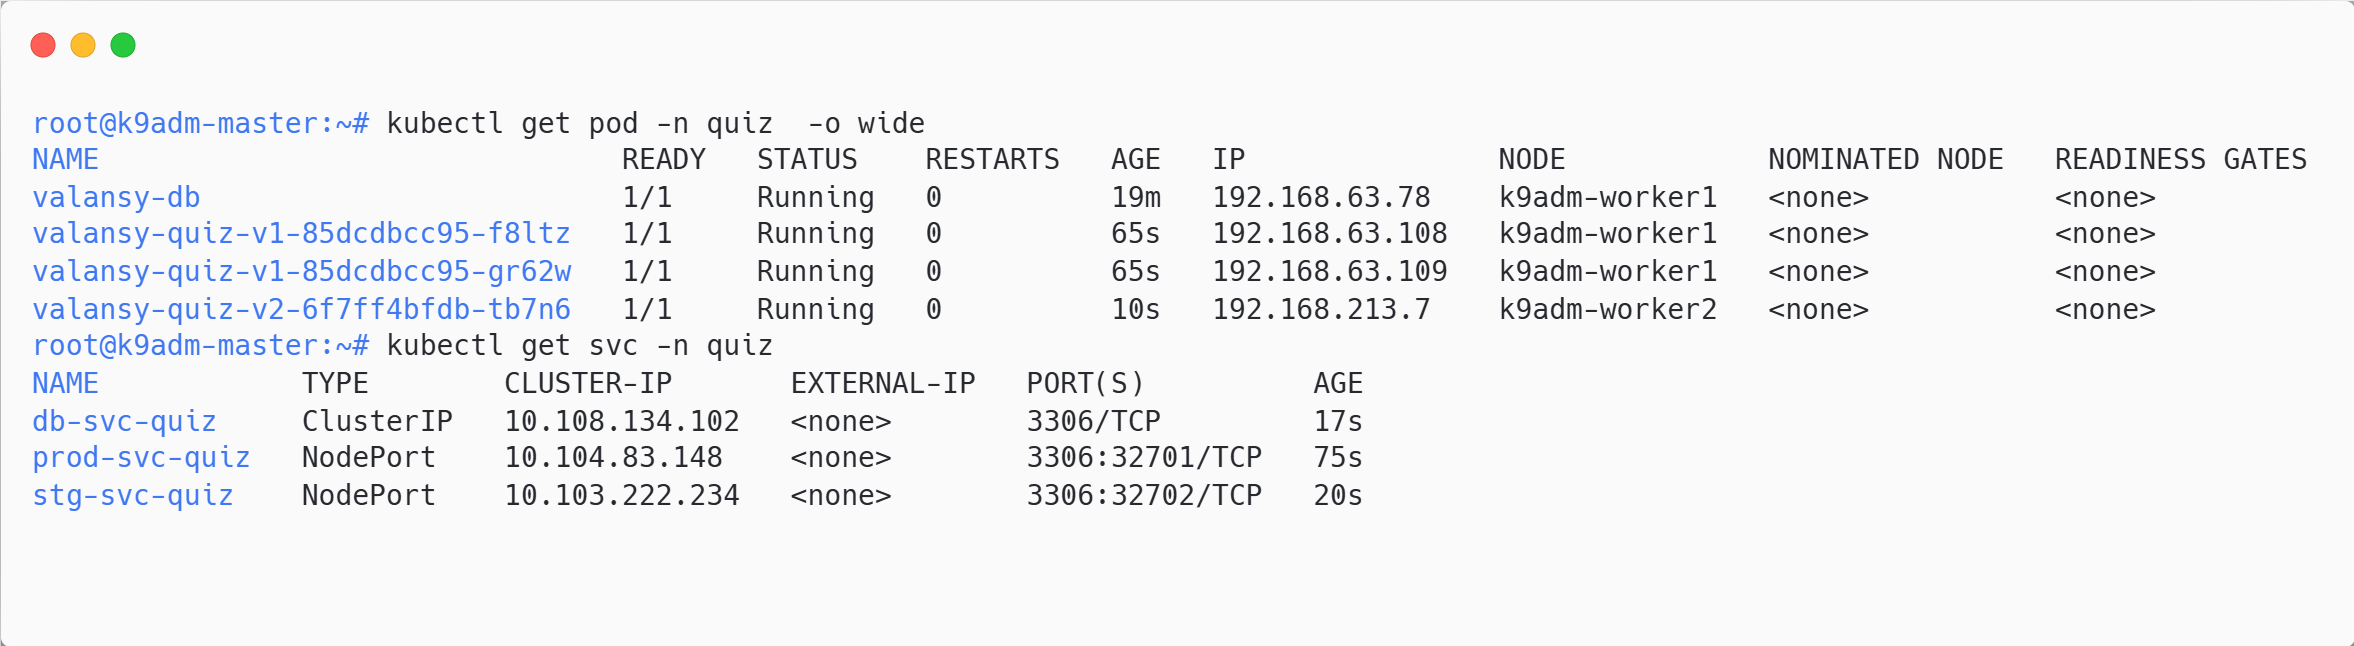
Creaete Network Policy
Create manifest network policy
nano quiz3-netpol.yamlapiVersion: networking.k8s.io/v1
kind: NetworkPolicy
metadata:
name: valansy-net-quiz
namespace: quiz
spec:
podSelector:
matchLabels:
run: valansy-db
policyTypes:
- Ingress
ingress:
- from:
- podSelector:
matchLabels:
env: prod
ports:
- protocol: TCP
port: 3306Apply manifest
kubectl apply -f quiz3-netpol.yamlVerifikasi netpol access mysql via pod quiz-v1 (production) dengan ekspetasi berhasil mengakses database
# Access via pod node 1
kubectl exec -n quiz -it valansy-quiz-v1-xxxxx-xxxx -- bash
bash-5.1# mysql -u root -h db-svc-quiz -prootpwquiz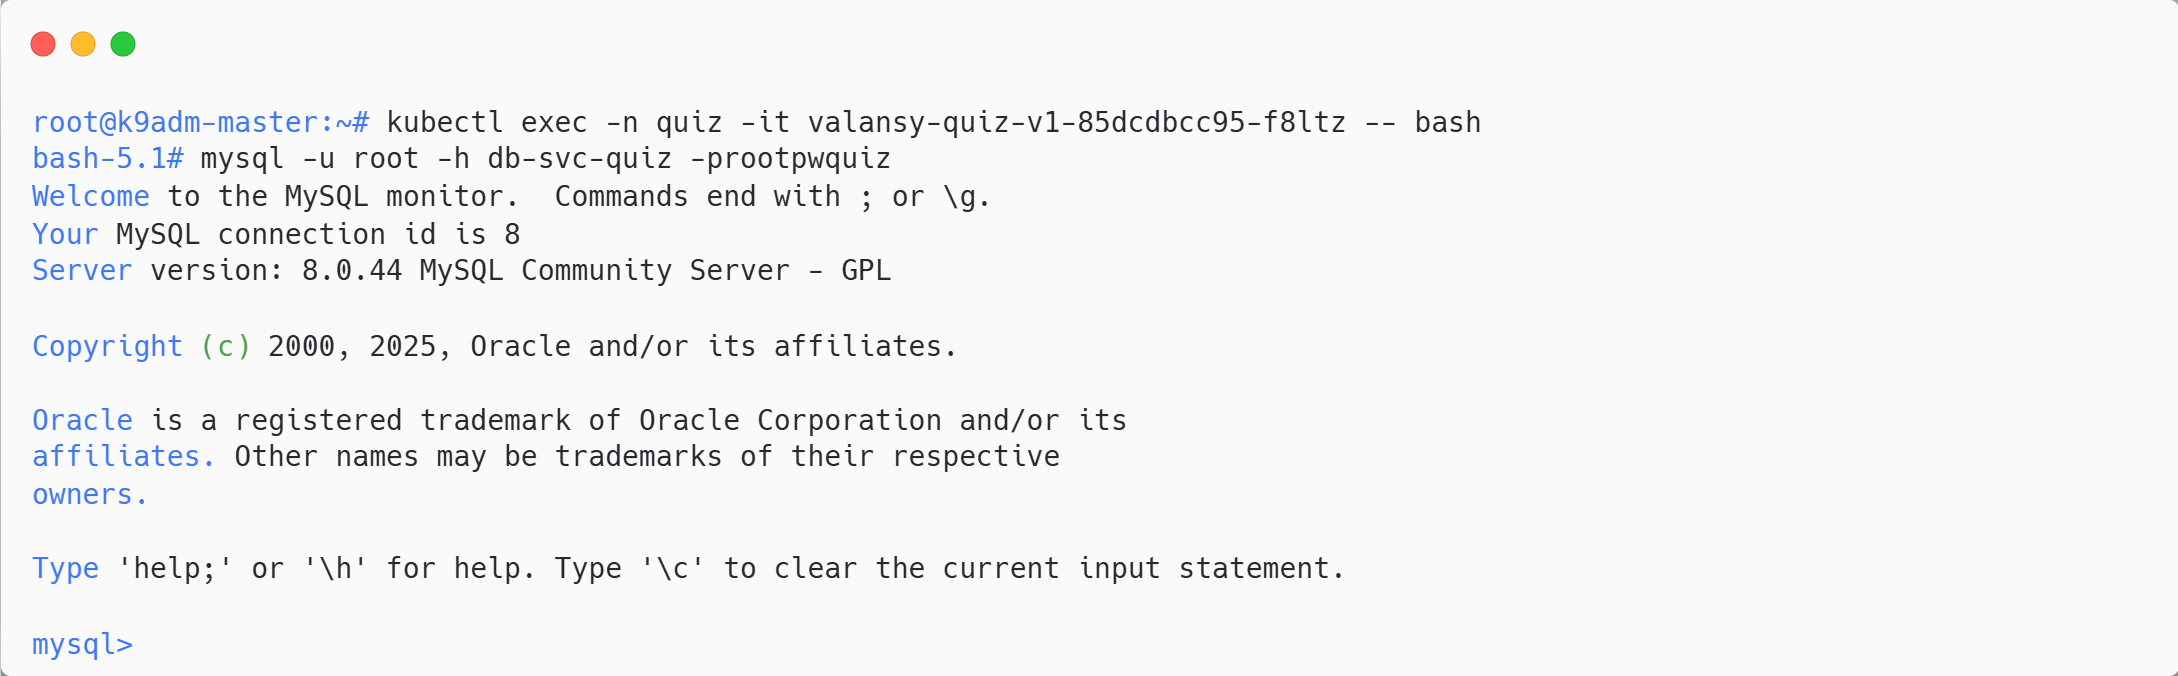
Verifikasi netpol access mysql via pod quiz-v2 (staging) dengan ekspetasi gagal akses database
# Access via pod node 2
kubectl exec -n quiz -it valansy-quiz-v2-xxxxx-xxxx -- bash
bash-5.1# mysql -u root -h db-svc-quiz -prootpwquiz